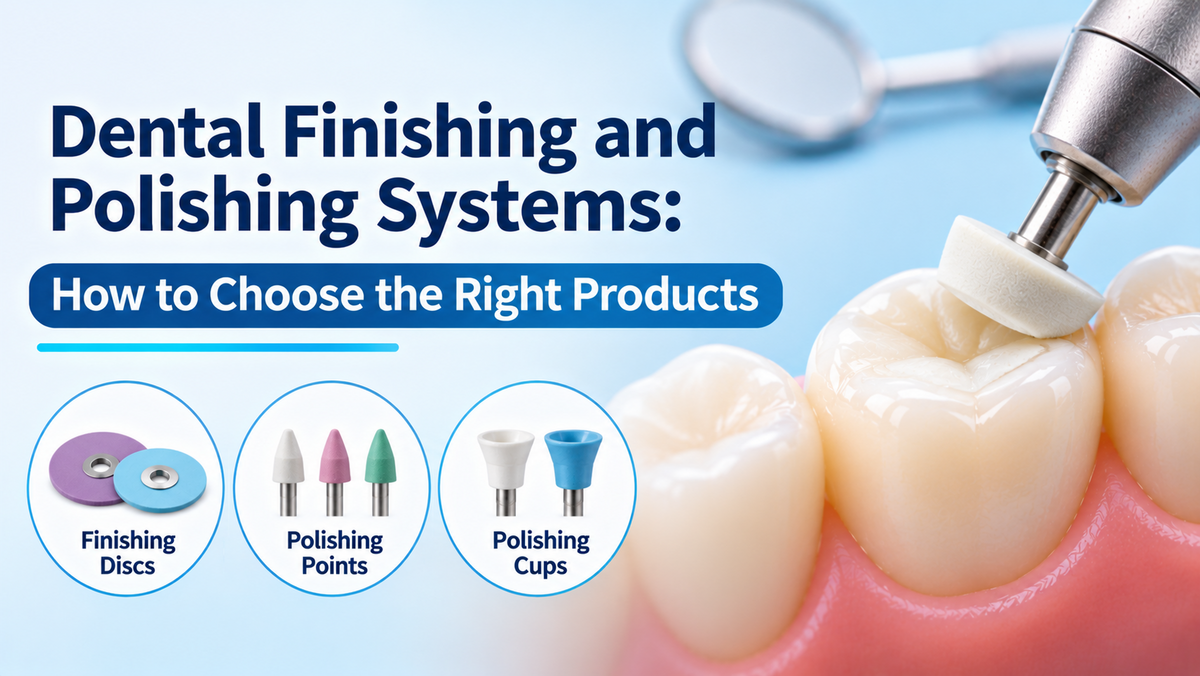
The final appearance of a dental restoration depends on more than the restorative material selected or the technique used to place it. Finishing and polishing are essential steps that help refine contours, smooth restorative surfaces, improve aesthetics, and support comfortable function. A restoration may have the correct shade and shape immediately after placement, but rough surfaces, excess material, and poorly refined margins can compromise the result.
For dental professionals, choosing the right dental finishing and polishing system involves understanding the restorative material, the location of the restoration, the type of surface refinement required, and the instruments available for the procedure. Composite resin, glass ionomer, zirconia, and lithium disilicate do not necessarily respond to the same abrasives or polishing sequences.
A well-selected system can help clinicians achieve a smooth surface and natural-looking finish while maintaining the restoration's anatomy. The goal is not simply to make a restoration shine. It is to create a surface that is properly contoured, comfortable, and appropriate for the material and clinical situation.
This guide explains the differences between finishing and polishing, explores the major types of dental polishing products, and provides practical tips for selecting and using them in restorative dentistry.
What Happens During Finishing and Polishing?
Finishing and polishing are related but distinct procedures. Understanding the difference helps clinicians choose the right instrument for each stage instead of expecting one product to correct every surface imperfection.
Finishing: Refining the Shape
Finishing focuses on removing excess restorative material, adjusting contours, refining margins, and establishing the intended anatomy. It may involve abrasive discs, finishing strips, fine burs, or other instruments designed for controlled material removal.
During finishing, clinicians may need to:
Remove excess composite around restoration margins.
Refine occlusal anatomy and surface contours.
Smooth transitions between the restoration and natural tooth structure.
Adjust proximal surfaces and contacts.
Remove irregularities left by matrices or restorative instruments.
Check the restoration's relationship with the opposing dentition.
The objective is controlled refinement rather than indiscriminate reduction. Removing too much material can damage margins, flatten anatomy, or create open proximal contacts.
Polishing: Refining the Surface
Polishing follows contour refinement and focuses on reducing surface irregularities to create a smoother finish and, when appropriate, a high gloss.
Depending on the restorative material, clinicians may use flexible discs, rubber cups, silicone points, polishing spirals, diamond-impregnated polishers, or polishing pastes.
An attractive shine does not necessarily indicate that a surface is adequately finished. A restoration can appear glossy while retaining scratches, irregular contours, or rough margins. For this reason, polishing should follow appropriate finishing rather than substitute for it.
Both stages contribute to the final result, but each requires instruments suited to its specific task.
Why the Right Finishing and Polishing System Matters
Surface quality influences more than appearance. Proper finishing and polishing can contribute to patient comfort, restorative aesthetics, and the maintenance of a well-contoured restoration.
Surface Smoothness and Plaque Management
Rough restorative surfaces can provide additional sites for plaque retention and may contribute to staining or gingival irritation. Smoothing the surface helps reduce irregularities, although polishing alone cannot prevent plaque accumulation or replace appropriate oral hygiene.
Natural-Looking Aesthetics
A polished composite restoration can reflect light more naturally and blend better with adjacent teeth. The achievable finish depends on the composite's filler characteristics, resin formulation, shade, and the polishing instruments used.
Marginal Quality
Refining the transition between the restoration and the tooth helps eliminate excess material and improve the finished contour. Care is particularly important near gingival margins, where aggressive instrumentation can damage adjacent tissues or tooth structure.
Occlusal Comfort
Finishing also allows clinicians to refine occlusal contacts and remove high spots when indicated. Occlusal adjustment should be conservative and followed by appropriate polishing of the adjusted surface, according to the material manufacturer's instructions.
Restorative Maintenance
A well-finished surface can support the restoration's appearance and function over time. However, clinical longevity also depends on bonding, material selection, cavity design, occlusal forces, patient habits, and regular dental care.
The Main Types of Dental Finishing and Polishing Products
Dental practices can choose from a wide range of abrasive instruments. Each format has advantages depending on the surface, material, and degree of refinement required.
1. Finishing Burs
Finishing burs are used for controlled contouring and removal of excess restorative material. They may be made from carbide or diamond abrasives, with different shapes and grit levels available for different applications.
Carbide finishing burs can be useful for refining composite anatomy, while fine diamond instruments may be selected for certain contouring tasks. The appropriate choice depends on the substrate and the manufacturer's recommendations.
Best suited for: Initial contour refinement, excess material removal, and shaping selected restorative surfaces.
Selection tip: Choose the bur based on the material being adjusted and the amount of reduction required. Coarse instruments can remove material efficiently but may leave scratches that require additional refinement.
2. Abrasive Finishing Discs
Finishing discs commonly use abrasive particles such as aluminum oxide and are available in different grit levels. Many systems use color-coded discs to help identify the sequence, although the exact color coding varies by manufacturer.
Flexible discs are particularly useful on accessible facial, lingual, and interproximal surfaces of composite restorations. Their flexibility can help clinicians follow contours while refining excess material.
Some systems include coarse, medium, fine, and extra-fine discs, allowing progressive refinement.
Best suited for: Smoothing and contouring accessible composite surfaces, especially in aesthetic restorations.
Selection tip: Consider disc diameter, flexibility, grit sequence, and access to the restoration. Discs are not ideal for every concave, narrow, or difficult-to-access surface.
3. Finishing and Polishing Strips
Interproximal finishing strips are designed for surfaces between adjacent teeth. They help refine excess material and smooth proximal margins that cannot be reached easily with discs or rotary polishers.
Depending on the product, strips may feature different abrasive grades or a non-abrasive central section to help preserve the contact area.
Best suited for: Interproximal finishing and removal of excess restorative material.
Selection tip: Use a strip that provides sufficient access without unnecessarily reducing the contact. Aggressive or uncontrolled strip use can open the contact or alter the proximal contour.
4. Rubber Cups, Points, and Wheels
Rubber or silicone polishers are available in cup, point, flame, wheel, and other shapes. Some contain embedded abrasives, while others are designed to work with polishing pastes.
Their geometry allows access to different restorative surfaces. Cups can be useful on broader surfaces, while points and flame-shaped polishers can reach selected grooves and contours.
Best suited for: Fine polishing of composite and other materials when the product is specifically indicated for the substrate.
Selection tip: Match the shape to the restoration's anatomy. Excessive pressure or inappropriate speed may generate heat, remove too much material, or alter surface contours.
5. Diamond-Impregnated Polishers
Diamond polishers contain diamond abrasive particles and are available in different shapes and configurations. Certain systems are designed for high-gloss polishing of composite or ceramic restorations.
Some diamond polishing systems use a two-step sequence, with one instrument for pre-polishing and another for final gloss. Other products are designed for fewer steps.
Best suited for: Material-specific polishing of indicated composite and ceramic restorations.
Selection tip: Confirm that the system is approved for the material being polished. A polisher suitable for composite should not automatically be assumed suitable for every ceramic.
6. Polishing Pastes
Polishing pastes contain abrasive particles and are applied using a compatible cup, brush, or other recommended applicator. Their abrasive composition and particle size vary according to the intended use.
Some are designed for composite restorations, while others are intended for ceramic materials or different clinical applications.
Best suited for: Additional surface refinement and gloss when recommended by the polishing system's manufacturer.
Selection tip: Do not assume that every restoration requires polishing paste. Some systems are designed to achieve their intended finish without an additional paste, while others recommend it as part of the protocol.
Match the System to the Restorative Material
One of the most useful selection principles is to start with the restorative material rather than the instrument's shape or price.
Composite Resin Restorations
Composite restorations are commonly finished with burs, discs, strips, points, cups, or dedicated composite polishing systems. The correct combination depends on the composite's filler structure, the restoration's location, and the desired surface finish.
A typical workflow may involve initial contouring, progressive smoothing, and final polishing. However, the precise sequence depends on the system and material.
For example, 3M Sof-Lex finishing and polishing systems include discs and strips for different stages of contouring and polishing. Product-specific instructions should guide the choice and sequence.
Zirconia Restorations
Zirconia restorations require polishing products specifically intended for zirconia. Adjusted surfaces may need to be refined using an appropriate sequence to achieve the recommended finish.
The clinician should avoid assuming that a composite polisher will provide the same result on zirconia. Material-specific instruments and manufacturer instructions are important, especially after occlusal adjustments.
Lithium Disilicate and Other Glass Ceramics
Lithium disilicate and other glass ceramics require products designed for the particular ceramic. Following adjustment, a compatible polishing system can help restore the surface finish.
The selected protocol should reflect the ceramic manufacturer's instructions, the type of adjustment performed, and whether additional polishing steps are recommended.
Glass Ionomer Restorations
Glass ionomer materials have different mechanical and surface characteristics from many resin composites. Finishing and polishing should follow the specific material's instructions, including any recommendations about timing after placement and setting.
The instruments and pressure used should be appropriate for the material to avoid damaging margins or creating unnecessary surface defects.
Amalgam and Other Restorative Materials
Some dental practices may still encounter existing amalgam restorations or other restorative materials requiring surface refinement. Each material requires an appropriate protocol and instrument selection. Clinicians should follow current professional guidance and applicable safety precautions rather than applying a composite polishing sequence indiscriminately.
A Practical Method for Selecting the Right System
When comparing dental finishing and polishing products, use the following decision process.
First, identify the substrate. Determine whether the restoration is composite, glass ionomer, zirconia, lithium disilicate, or another material. This establishes which product categories are appropriate.
Second, define the task. Decide whether you need to remove excess material, refine the anatomy, smooth a margin, adjust a contact, or produce a high-gloss surface. Different tasks require different instruments.
Third, consider access. Broad facial surfaces, narrow interproximal spaces, deep grooves, and posterior occlusal surfaces may require different instrument shapes.
Fourth, review the number of steps. Single-step and multi-step systems offer different workflows. A reduced-step system may save instrument changes, but it must still achieve the desired finish when used as directed.
Fifth, check operating requirements. Verify the recommended speed, pressure, duration, cooling, and handpiece compatibility. These requirements are product-specific.
Finally, evaluate the result. Inspect the restoration's contours, margins, surface quality, proximal contacts, and occlusion before completing the procedure.
Step-by-Step Workflow for Finishing and Polishing a Composite Restoration
Although exact instructions vary by product, the following outline illustrates the general sequence used for many composite restorations.
Step 1: Inspect the Restoration
After the restorative material has been placed and cured according to its instructions, examine the restoration for excess material, irregularities, marginal defects, and contour concerns.
Step 2: Remove Excess Material
Use an appropriate finishing instrument to remove flash and establish the general shape. Maintain control around the margins and avoid unnecessary reduction of the restoration or adjacent enamel.
Step 3: Refine Anatomy and Contacts
Shape the restoration to the required anatomy and check proximal contacts. Use interproximal strips where appropriate, taking care not to weaken the contact or damage adjacent surfaces.
Step 4: Smooth the Surface
Move to the finer abrasives or finishing instruments recommended by the system. Progression through the appropriate sequence helps reduce scratches left by earlier instruments.
Step 5: Polish to the Desired Finish
Use the designated polishing instruments and any recommended paste. Follow the manufacturer's instructions for instrument speed, contact time, pressure, and cooling.
Step 6: Inspect and Verify
Assess the surface visually and, where appropriate, with suitable clinical examination techniques. Recheck marginal contours, contacts, occlusion, and patient comfort. Any areas adjusted during this final check should receive appropriate refinishing and polishing.
Common Errors That Can Compromise the Finish
Skipping the Finishing Stage
Moving directly to a polishing instrument may leave excess material or surface irregularities beneath the gloss. Establish the correct contour before final polishing.
Using the Same Abrasive on Every Material
Composite, zirconia, and glass ceramics differ in their physical properties. Use a system designed for the specific restorative material.
Applying Excessive Pressure
Heavy pressure can create heat, alter anatomy, and cause unnecessary material removal. Use the recommended pressure and speed rather than forcing the instrument to work faster.
Using the Wrong Sequence
Coarse abrasives can leave scratches that finer instruments may not remove efficiently if the sequence is incomplete. Follow the product's recommended progression.
Neglecting Adjacent Enamel
Finishing instruments can scratch adjacent tooth structure if they are not controlled carefully. Choose appropriate instruments, maintain access and visibility, and protect adjacent surfaces where necessary.
Overlooking Interproximal Areas
A restoration may appear smooth on its visible surfaces while excess material remains between the teeth. Check proximal contours and margins without unnecessarily opening the contact.
Ignoring Manufacturer Instructions
Recommended speed, contact time, water cooling, and reuse or sterilization requirements can differ among products. Instructions should take priority over generalized protocols.
How Dental Practices Can Manage Finishing and Polishing Supplies
An organized inventory helps clinicians select the right product without keeping unnecessary duplicates.
Consider maintaining separate groups for:
Composite finishing discs and strips.
Carbide and diamond finishing burs.
Composite polishing cups, points, and spirals.
Zirconia polishing instruments.
Glass-ceramic polishing systems.
Compatible polishing pastes and accessories.
Labeling systems by material and clinical purpose can reduce confusion during procedures. Staff should also understand which items are single-use and which can be reprocessed, according to the manufacturer's instructions and infection-control requirements.
When evaluating costs, consider more than the purchase price. The number of steps, number of restorations per kit, replacement frequency, instrument durability, and time required to complete the protocol all affect the overall value.
Frequently Asked Questions
1. What is the difference between dental finishing and polishing?
Finishing focuses on contouring, removing excess material, refining margins, and establishing anatomy. Polishing reduces surface irregularities and improves smoothness and gloss. Both may be needed to achieve an appropriate final restoration.
2. Which polishing system is best for composite restorations?
The best system depends on the composite, restoration shape, desired finish, and manufacturer recommendations. Discs, strips, rubber polishers, diamond-impregnated instruments, and polishing pastes may all have a role in suitable protocols.
3. Can the same polishing system be used for composite and zirconia?
Only if the manufacturer specifically indicates that the system is suitable for both materials. Composite and zirconia have different properties, so material compatibility should be checked before use.
4. Are single-step polishing systems better than multi-step systems?
Not automatically. Single-step systems can simplify the workflow, while multi-step systems provide progressive abrasive refinement. Research suggests that some reduced-step systems can achieve comparable results, but outcomes depend on the specific system, material, and technique.
5. Do all dental restorations need polishing paste?
No. Some polishing systems are designed to achieve the intended finish without an additional paste. Others recommend paste as part of their protocol. Follow the product instructions.
6. How can clinicians avoid damaging enamel during finishing?
Use suitable instruments, maintain visibility and control, avoid unnecessary contact with adjacent teeth, and follow the recommended technique. Protective measures and careful instrument selection are especially important when working near interproximal enamel.
Final Thoughts
Dental finishing and polishing systems are essential tools for refining restorative contours, improving surface quality, and achieving appropriate aesthetics. Selecting the right products begins with identifying the restorative material and the task that needs to be completed.
Composite restorations may require a combination of burs, discs, strips, and dedicated polishers. Zirconia and glass ceramics require compatible material-specific systems, while glass ionomer restorations should be finished according to their own instructions.
For dental practices, the most effective system is not necessarily the one with the fewest steps or the highest price. It is the one that matches the restorative material, provides suitable access and control, and achieves the intended result when used correctly.
Before purchasing a finishing and polishing system, review its indications, abrasive sequence, handpiece requirements, reuse instructions, and compatibility with the materials used in your practice. Careful selection and consistent technique help support a smooth, functional, and aesthetically appropriate restoration.